← All posts Posted on April 21, 2018
Perhaps for a little paranoia or for being diligent with the privacy of our communications, we want that some messages we send can only be read by whom we want to be read, for that we use encryption. What is encryption? It is merely to take a readable message and turn it into something unreadable for anyone, except for the indicated recipient if he uses the appropriate tools.
One of the most popular methods to encrypt messages in our era is to use PGP technology (Pretty Good Privacy), which is a cryptography system quite widespread on the Internet. In this article, we will deal with the installation of software for its use (although there are online applications that allow us to do this without installing anything), create and import keys and encrypt and decrypt messages.
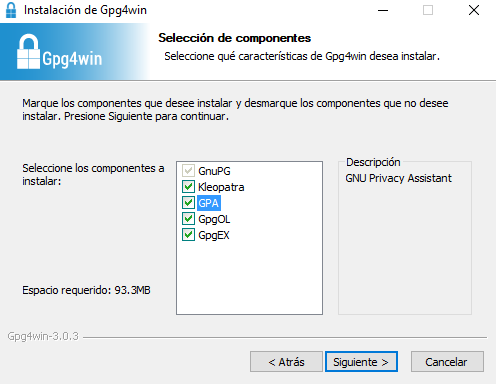
There are many applications that we can choose, for this example we will use Gpg4win (which is free, based on the OpenPGP standard). If you chose the Gpg4win to use, you have to look carefully in the installation box to include GPA (GNU Privacy Assistant) which is the PGP certificate handler that we will use in this example. By default, it includes Kleopatra that is more complete and whose use is similar, but we chose GPA for this guide since we find it more simple and didactic.
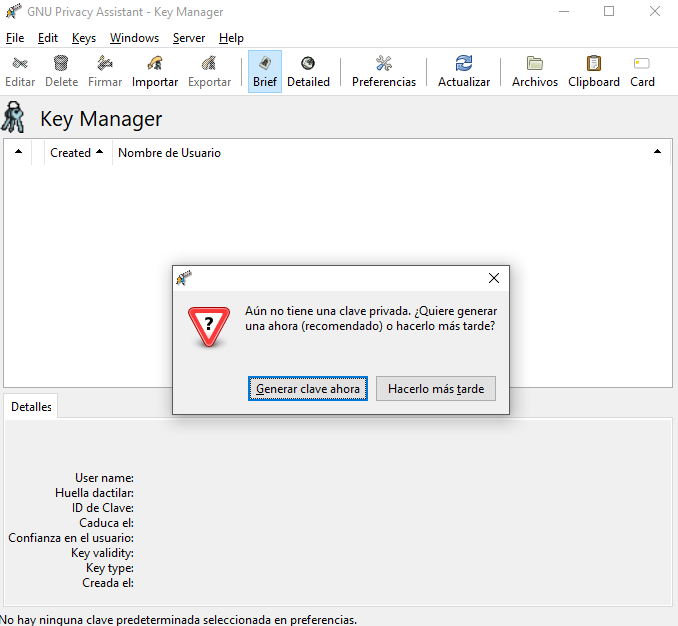
The first time we open the GPA, if you do not have any private key configuration by default, you will let us know in a dialog box, so let’s configure ours.
In the data that you are going to ask us next, it is not necessary that we place our real information. In fact, it is quite common to place a false name and email address. It is a normal behavior among people who are extremely jealous of their privacy. It will also ask if we want to create a backup of our password, which is always advisable.
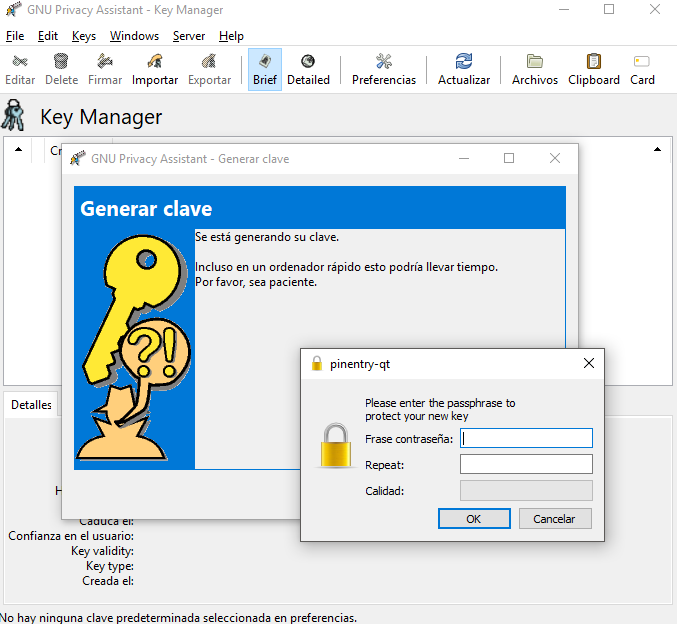
A few seconds after filling in the data, you will ask us to generate a password for our private key. As always, let’s use one that we can remember, but that is strong enough not to be guessed by third parties. It would also be ideal that it is not the same password that we use for other applications.
If we have selected the option to save a backup, it will ask us where we want to locate it. After this, the key has been created. So he will request the password to be able to import it into our key manager. Once done, we will see that the key already appears on our keychain with the data that we have placed.
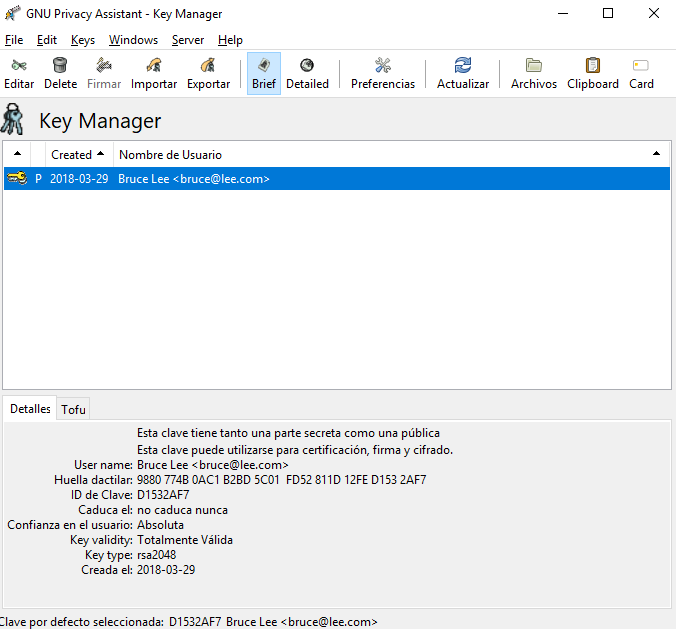
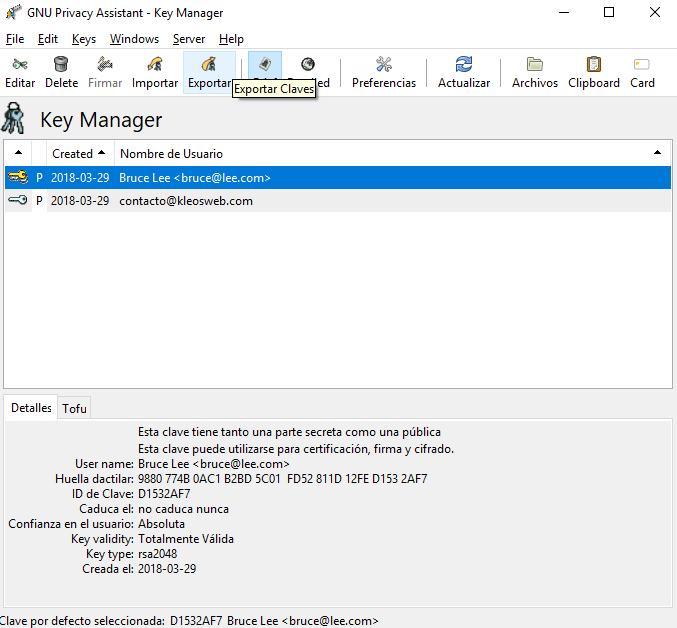
If we place ourselves on the key we have just created, we can see below in its details a very important message: the key has a secret part (that resides only in the device where we created or imported it), another public one (which we can publish for others to encrypt messages just for us) and serves for certification, signing and encryption. What does this mean? We can not only encrypt and sign messages with it but also decode those that are sent to it.
Being a bit lost at this point is normal if you have never worked with these security protocols, but with the exercise below, we will take a little more practice.
The first thing we need to send an encrypted message through PGP is to know the public key of the recipient. People who are available to receive encrypted messages usually post their public keys on their social profiles or websites. Let’s find one, for example, that of Kleos, which is in this URL.
Once we have the public key of whom we are going to write, we save it in a .txt file and import it into the keychain of our GPA. This will open a dialog box where we must locate the mentioned .txt on our hard drive. Once this is done, it will give us a message confirming the import, and we will see the key on our keychain.
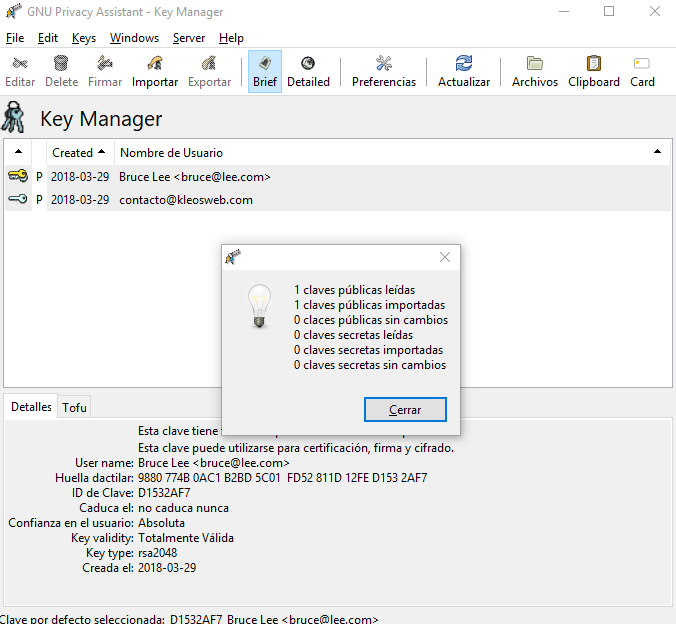
As seen in the previous image, we now have two keys. One private (ours) and one public, that of Kleos. Let’s go something simple: write a test message to the public key that we just imported.
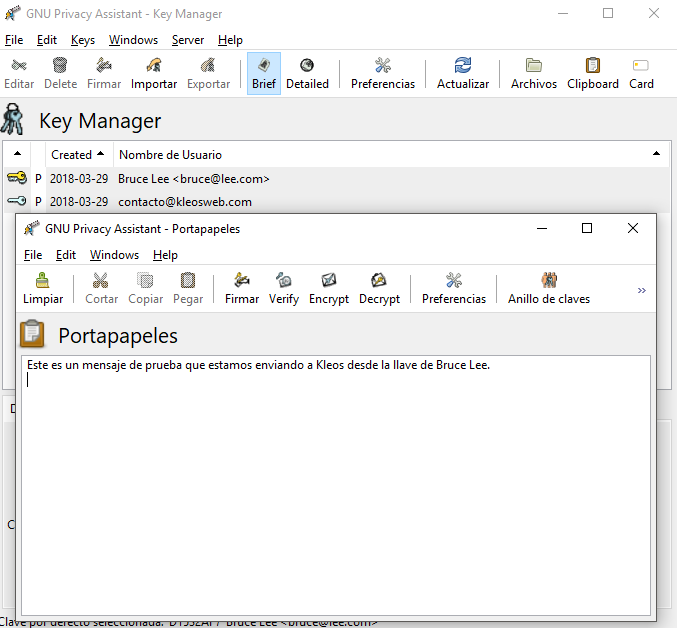
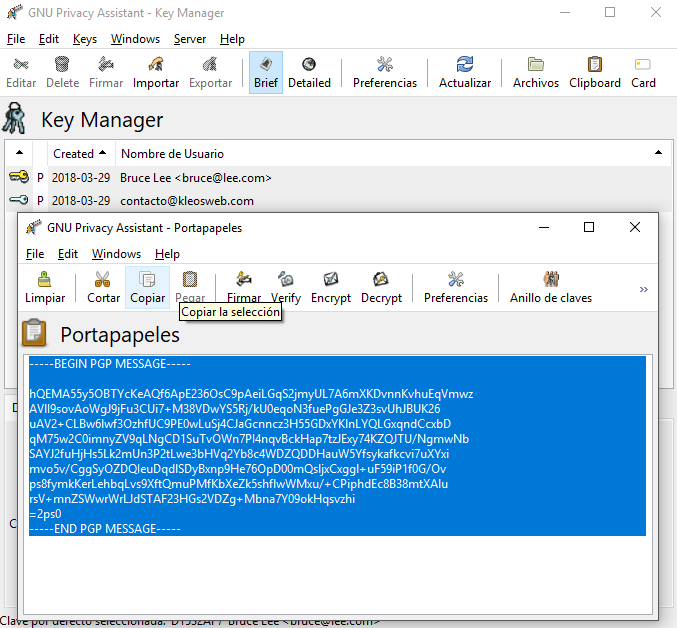
We press the “Clipboard” button in our toolbar, and a mini text editor will open. Here we can copy a text that we have from another program or write a new one.
Written the message, now we must encrypt it. Pressing on the “Encrypt” button of the Clipboard, it will ask us for which of the public keys that we manage we want to code it. We will select the one from Kleos because it is to them that we will send it to.
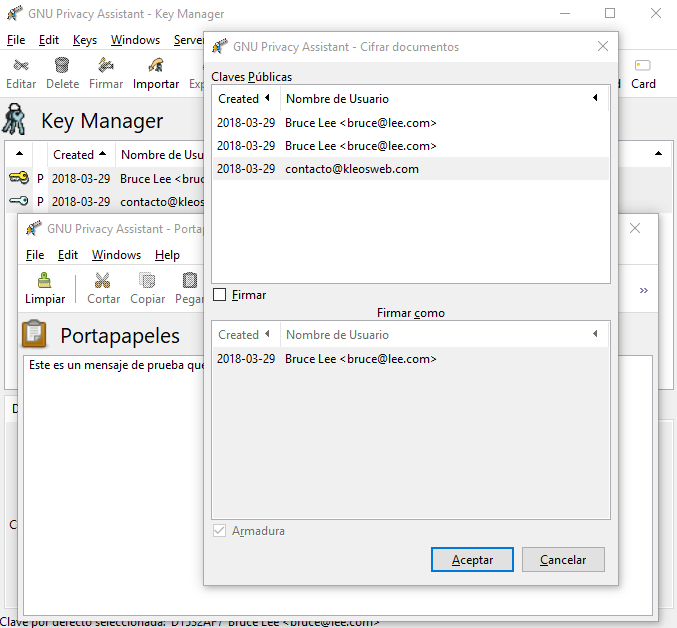
It is important to see that we have the option “Sign,” to do the same with our private key, Bruce Lee. We only have to do this if the recipient of the message knows our public key. Otherwise, it will not be able to decode it. In case we are not sure that the recipient has it, we encrypt without signing.
We have selected to encrypt without signing, and we have issued an alert saying that it is not certain that this person is whom they say they are (Remember what we mentioned above, it is a common practice not to put the real data). However, as we have taken this key from the official website of the entity that issues it, we know that it is real. So we say we are sure we want to use that public key. By doing so, we will get the coded message.
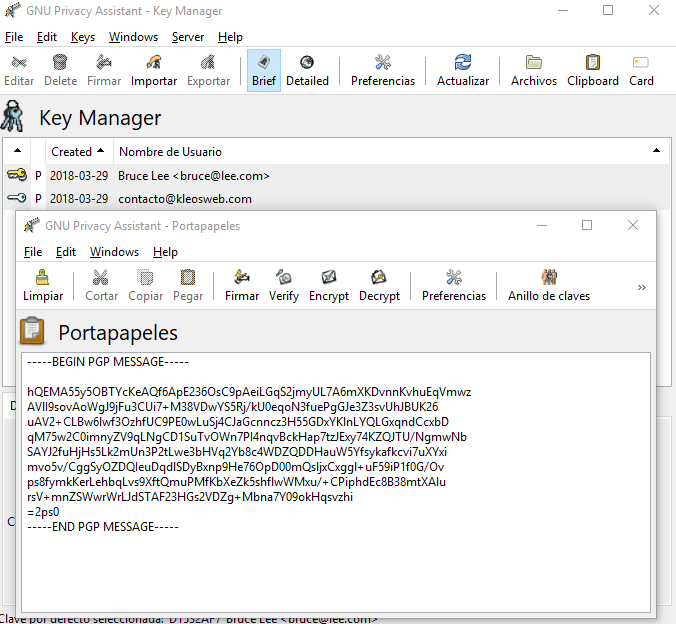
That message is our encrypted text, which can only be decoded by the holder of the private key that we have selected as the recipient of its public key. How do we make him read it? Well, we simply copy the entire fragment of the text (from the dotted line at the beginning to the dotted end) and use that text to send it by email, copy it into a file or whatever we want it to be.
The receiver of that email or file will receive that message as we send it and to decode it, you will need to use your private key to read it.
If we receive a message with the same format as the one we sent in the previous point, it is encrypted, and we must decode it using our private key. This can only be done from the application where we have installed our private key. Needless to say, to have a message encoded for us, the sender must know our public key to encrypt it as we did in the previous point.
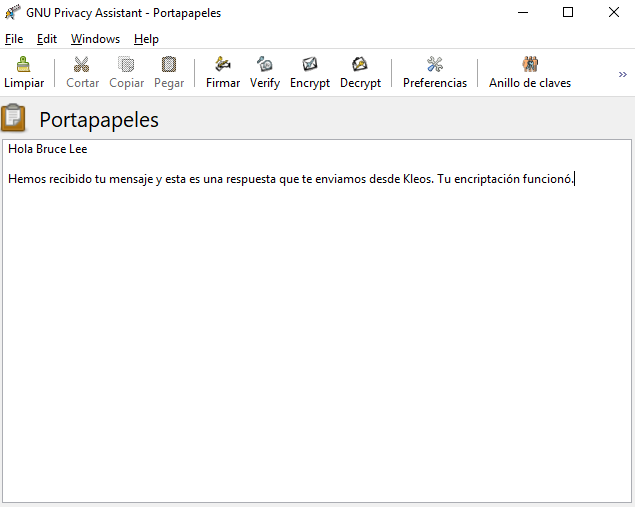
So let’s open the GPA Clipboard and copy the message we received. Now, instead of encrypting it, we are going to decrypt it.
If our public key was placed correctly by the sender and the private key of destination is installed in our application, it will ask for the password of the same, we place it, and we give “Accept.” What will we have as a result? The message that the sender sent us, but without encryption. Ready to read
We have already created our private and public key, we have sent and received encrypted messages, but how can we make people aware of our public key and send us encrypted messages?
Again, we go to our keychain, select our secret key and press “Export”. There it will open a box where we must locate the file where we want to store our password. It will be saved as a text file.
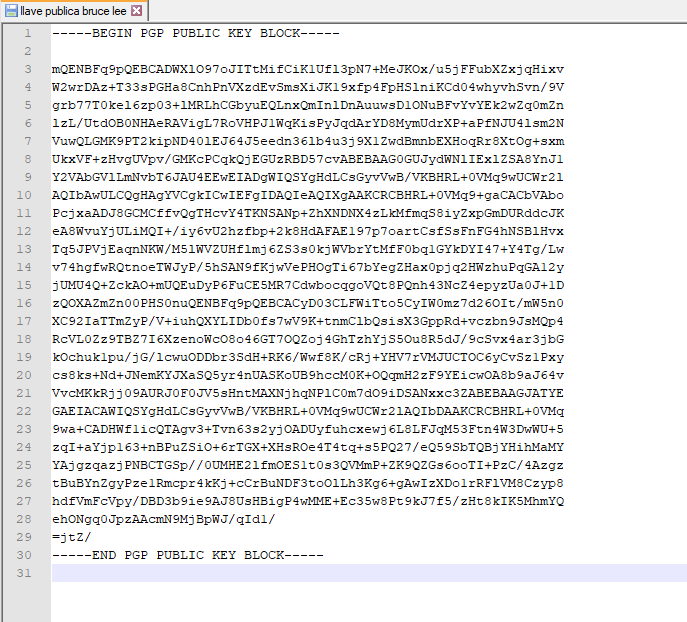
When we open it, we can see its content, and we can place it on our website, in our social network profile or in a service to place texts such as pastebin.com. By sharing that content, others will know our private key and will have the means to encrypt messages for us.
Remember well that when encrypting a message, if it is placed “Sign,” the recipient of the same must have us on your public keychain, because otherwise, it will be impossible to recognize our signature and the message will not be able to decode it.
There are many packages that include automatic file encryption, emails and so on. The complete Gpg4win that brings this installation we have done offers several of these features, but the purpose of this tutorial has been to understand the basic operation of public and private keys and how to encrypt and read encrypted messages.
We hope it has been of your help!
